OPEN: MON - FRI 8AM - 5PM
Check our current lead time for Cut & Edge orders COLLECTIONS: 8AM - 4PM
Kitchen cabinet doors come in several common sizes, but the right replacement depends on the units you already have. Even a small difference can leave uneven gaps or cause neighbouring doors to catch.
Published: 22nd September 2026
The important distinction is between the size of the cabinet and the finished size of its door. An overlay door covers the front edges of the cabinet while leaving gaps beside neighbouring doors and drawer fronts.
If you are replacing a door that fits correctly, its actual measurements are usually the best starting point. Check the thickness and hinge positions before ordering, too: matching the height and width alone does not guarantee a suitable replacement.
Explore Cworkshop’s replacement kitchen doors when planning new fronts for your existing units.
A common UK base cabinet has a 720 mm-high carcass and a 715 mm-high full-height door. The carcass is the cabinet box, excluding its legs, plinth and worktop.
The following examples use a 715 mm door height and a door width 4 mm smaller than the cabinet’s outside width. All door dimensions below are height × width.
| Nominal cabinet width | Example finished door size |
|---|---|
| 300 mm | 715 × 296 mm |
| 400 mm | 715 × 396 mm |
| 450 mm | 715 × 446 mm |
| 500 mm | 715 × 496 mm |
| 600 mm | 715 × 596 mm |
The cabinet’s installed height is a separate measurement. For example, a 720 mm carcass on 150 mm legs reaches 870 mm before adding the worktop. The legs and worktop are excluded when measuring the door.
Wider units may have two doors or wide drawer fronts. An 800 mm cabinet does not automatically need a single 796 mm door; first establish how its front is divided.
Kitchen door clearances allow neighbouring fronts to open and close without catching. They also create the visible lines between doors, drawers and surrounding panels.
For a single 596 mm door centred over a 600 mm-wide cabinet, the width difference is 4 mm in total: 2 mm at each outside edge. Where two such cabinets meet, the adjoining door setbacks combine to make a 4 mm gap.
Similarly, a 715 mm door on a 720 mm carcass has a total height difference of 5 mm. The top and bottom clearances must follow the kitchen design and the alignment of adjacent fronts.
Overlay doors cover part of the cabinet sides, so they are usually wider than the clear internal opening.
For example, a 600 mm-wide cabinet with two 18 mm sides has a 564 mm internal opening: 600 − 18 − 18. A 596 mm overlay door extends beyond that opening to cover the front edges of the sides. Subtracting a clearance from the 564 mm opening would produce a different, much narrower door.
Inset doors sit within an opening or face frame. Their sizing follows the opening, the required gaps and the hinge arrangement. Establish whether the door is overlay or inset before calculating a new size.
Wall cabinet doors come in several heights, depending on the cabinet range and the available space. A 715 mm front is common, but shorter and taller wall units need different doors.
| Wall cabinet carcass height | Matching door height in this range |
|---|---|
| 575 mm | 570 mm |
| 720 mm | 715 mm |
| 900 mm | 895 mm |
Check the existing front before matching a wall-unit label such as “standard” or “tall”. Those descriptions do not establish the same height across every range.
Check whether a wider wall cabinet uses one front, a pair of doors or a lifting arrangement. A lift-up front needs hardware suited to its dimensions and weight; matching the width of an ordinary side-hinged door is not enough.
These fronts follow the layout of the unit and its hardware. Measure each piece separately, including small panels that appear to continue the line of a drawer.
A drawerline base unit has a shallow drawer above a shorter cupboard door. One common arrangement uses a 140 mm drawer front above a 570 mm door, with a 5 mm gap between them.
Together, those fronts and the middle gap occupy 715 mm: 140 + 5 + 570. The remaining clearance belongs around the outside of the arrangement. These are the drawerline dimensions described in DIY Homefit’s guide above.
Drawer stacks can use different combinations of shallow and deep fronts. Record the visible front dimensions and fixing positions separately from the drawer box behind them.
Tall units may use one long door or several fronts stacked vertically.
Check every dividing line against the cabinet layout. If you change from two fronts to one, the hinge arrangement, door weight and access to internal fittings also need reviewing.
Integrated appliance doors must suit the appliance’s installation specification. A nominal 600 mm dishwasher or fridge housing does not establish the complete door dimensions or fixing pattern.
Check the permitted front height, thickness and weight, mounting positions and opening clearance. On a dishwasher, the lower edge must move past the plinth as intended. On a fridge-freezer, the division between furniture fronts must match the appliance and its fixing system.
Keep any required ventilation openings clear when planning replacement panels.
No. UK kitchen ranges use different door dimensions, gap allowances and hinge arrangements, even when the cabinets have similar nominal widths.
For example, IKEA’s VEDDINGE door sold as 60 × 80 cm measures 797 mm high and 597 mm wide. This illustrates why a catalogue size and the physical door measurement need checking separately.
A door measuring 495 mm wide should also be recorded as 495 mm, rather than rounded to the 496 mm example in the base-unit table. Compare its current gaps and operation before deciding whether to reproduce that size.
Where possible, identify the original kitchen range. The brand alone may not establish compatibility with a different generation of cabinets or hinges.
Measure each existing door and drawer front individually, provided it fits correctly and is undamaged. Before copying a poorly fitting door, check whether the problem comes from hinge adjustment, a cabinet that is out of square or the panel itself.
Measure across the flat back of the door, from finished edge to finished edge. Front profiles and bevels can make the outer dimensions harder to identify accurately.
Record the height, width and thickness in millimetres. Check the height and width in more than one position, particularly if the door looks swollen or distorted.
Label each component by location, such as “sink left”, “oven drawer” or “wall unit right”. Doors that look identical may have different measurements or drilling positions.
When copying a correctly fitting door, record its finished size directly. Subtracting another gap allowance would make the replacement smaller than the original.
Measure hinge cup positions on the back of the door and record the reference edge used for each measurement. The cup is the recessed part of a concealed hinge fitted into the door.
For a replacement using the existing hardware, check:
The cup-hole diameter and depth.
The distance from the top or bottom of the door to each cup centre.
The cup position relative to the hinged side edge.
The fixing-hole pattern and the hinge and mounting-plate type.
The number of hinges and the door’s opening direction.
Follow the supplier’s drawing convention for left- and right-hinged doors. For intermediate hinges, use clearly labelled measurements from a consistent reference edge so the drilling positions cannot be confused.
Changing door thickness or weight may require different hardware. Blum’s hinge range includes different options for standard, thick, thin, inset and corner applications; use the planning information for the actual hinge.
Cworkshop’s CNC drilling service can prepare hinge holes to specified sizes, depths and positions. Confirm the drilling details separately from the door dimensions.
For a cabinet without a usable original door, record the outside dimensions, internal opening, side thickness and intended hinge arrangement. Then establish the finished gaps and overlays before calculating the front sizes.
For example, suppose an 800 mm-wide cabinet will have two equal doors, with 2 mm setbacks at the outer edges and a 4 mm gap between the doors:
Each door width = (800 − 2 − 2 − 4) ÷ 2 = 396 mm.
That result depends on the stated clearances. An inset arrangement, centre post or different hinge specification can change the calculation. Check the proposed layout against the hardware before ordering.
Door thickness affects hinge selection, opening clearance and how far the front projects beyond the cabinet. Check the existing thickness before replacing a door with a heavier or thicker design.
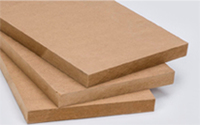
For painted doors, medium-density fibreboard (MDF) can provide a smooth surface. Choose the board and door construction for the kitchen conditions, finish and hardware; moisture-resistant MDF still needs suitable finishing and is not waterproof.
For decorative slab fronts, specify the required panel edgebanding alongside the face material. Confirm whether the dimensions entered on the order represent the finished edged panel or the unfinished blank. Apply any edging allowance once, according to the supplier’s ordering method.
If you plan to paint the fronts yourself, our guide to priming and painting MDF explains how to prepare the faces and cut edges. Include the finishing stage when checking close clearances and planning assembly.
A description such as “600 mm door” may refer to the cabinet it fits. Confirm the physical door dimensions before ordering.
The door needs to cover part of the cabinet’s front edges. Using only the clear opening can leave too much of the carcass exposed.
A correctly fitting existing door already incorporates its clearances. Copying its measurements and then deducting another allowance creates larger gaps.
A door can have the correct height and width while its cup holes miss the existing hinge positions. Measure every drilling location before specifying the replacement.
Full-height cupboard doors do not establish the sizes of shorter fronts or integrated appliance panels. Record these separately so the finished horizontal lines align.
Order from a component list that records each door and drawer front separately. Include the finished dimensions, quantity, thickness, material, edge treatment and any machining required.
For wood-effect or veneered fronts, specify grain direction and identify any sequence that should continue across adjoining panels. For Shaker doors, agree the frame proportions and panel layout as well as the overall size.
Cutting a rectangular blank is one stage of preparing a door. Edging, hinge drilling, profiling and finishing must also be specified where required, with fitting and final adjustment completed on the cabinets.
Use Cworkshop’s boards cut to size service once your panel dimensions, edge treatment and machining requirements are confirmed.
Cworkshop supplies cut-to-size panels and made-to-measure Shaker doors and drawer fronts, so your order can follow the dimensions required by the project.
Our Shaker doors use a five-piece construction with a moisture-resistant MDF frame. Primed and painted options are available, while cutting, edgebanding and CNC drilling can be specified for suitable panel-based fronts.
Discuss the finish alongside the dimensions and hardware. This establishes which parts arrive prepared and which work remains during fitting.
Standard kitchen door sizes are useful reference points, but the finished dimensions must work with the cabinet, clearances and hinges. Keep the outside carcass size, internal opening and actual door size distinct when measuring.
Once each front is recorded accurately, you can choose the material and finish and prepare a clear order for cutting, machining and fitting.
Explore Cworkshop’s made-to-measure Shaker doors for kitchen fronts sized to your project.