OPEN: MON - FRI 8AM - 5PM
Check our current lead time for Cut & Edge orders COLLECTIONS: 8AM - 4PM
You can replace IKEA PAX wardrobe doors while keeping the frames and storage inside, provided the frames are sound and the new doors fit the hinge system. It’s a way to change the colour or style of your wardrobe without starting again.
Published: 7th October 2026
You can choose suitable IKEA doors or have doors made to measure. The important part is matching the replacements to your existing wardrobe: the door size, thickness, weight and hinge positions all affect the fit.
Explore Cworkshop’s made-to-measure Shaker doors for a framed, painted wardrobe design.
Replacement doors need a stable frame with secure hinge fixings. Check the wardrobe sides, base and existing screw holes before deciding which fronts to order.
Look for loose joints, swollen panels or hinges that pull away from the side. A heavier new door can put more strain on an already damaged fixing, so deal with these problems first.
Check that the frames are level and square, too. If a frame leans or twists, correctly sized doors can still hang with uneven gaps.
The wardrobe must also be secured to the wall, as required by IKEA’s PAX frame guidance. Use fixings suited to the wall, and follow the instructions for your particular frame.
Record the frame’s width, height and depth. Keep any product number or assembly instructions you have, especially when replacing doors on an older wardrobe.
Hinged replacement doors must suit the hinges and their mounting positions on the wardrobe sides. They also need enough room to swing open without hitting a wall, bed or nearby furniture.
Sliding replacement doors must suit the existing tracks and door fittings. The panel thickness and weight matter as well as its height and width.
Some PAX sliding systems use decorative panels held inside aluminium door frames. IKEA’s sliding door frames and rails are an example. For this type, identify the exact system before choosing replacement inserts and follow its panel requirements.
Confirm that the replacement panels suit the tracks and fittings before ordering, even if their measurements match the old panels.
IKEA’s PAX door size labels are rounded. Check the detailed product measurements rather than using the dimensions in the product name as a cutting size.
These two current FORSAND doors show the difference:
| PAX frame height label | IKEA door size label | Finished door size: width × height |
|---|---|---|
| 201 cm | FORSAND 50 × 195 cm | 495 × 1,946 mm |
| 236 cm | FORSAND 50 × 229 cm | 495 × 2,294 mm |
Both examples are 18 mm thick. These measurements apply to those specific doors. Check your own doors and frame before using them for a custom order.
The wardrobe frame is taller than its door. Ordering a door at the full frame height would therefore give you the wrong size for these arrangements.
If your existing doors fit well, their actual measurements are usually the most useful starting point. Check each different door size in the wardrobe rather than assuming every front is identical.
Measure the finished door and record its hinge positions before ordering a replacement. A door can have the correct height and width but still be unusable if the holes are in the wrong places.
Record the door’s height, width and thickness in millimetres. Measure the panel itself, without including the handle or projecting hinge parts.
Copying a correctly fitting door means copying its finished dimensions. Don’t subtract another clearance gap from those measurements.
If the new door will have edging applied, tell the cutting service that your measurements are the required finished sizes, including the edging. Otherwise, the added edging could make the door too wide for the planned gaps.
The large round recess on the back of the door holds the hinge cup. Record its position along with the smaller fixing holes around it.
For each door, note:
Use the same starting edge for all measurements along the door. This makes the drawing easier to check and reduces the chance of mixing measurements taken from opposite ends.
Label the front and back, and show which edge carries the hinges. Photographs help explain the arrangement, but the machining still needs accurate dimensions.
Start with the actual frame measurements and identify the hinges you intend to use. The hinges control how the door covers the front edges of the frame and how much room it needs to open.
Agree the finished door size and drilling layout before cutting. A door size copied from another wardrobe may leave the wrong gaps, even if both wardrobes are described as PAX.
Include the positions of drawers and pull-out trays where they could clash with the hinges. This is particularly useful when adding doors to a wardrobe that was previously left open.
Choose the appearance and construction together. For a tall wardrobe door, ask the panel supplier which boards suit that use, then check the thickness and weight against the hinge requirements.
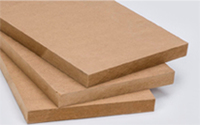
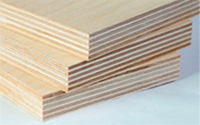
Medium-density fibreboard (MDF) has a smooth face that suits painted doors. A plain, flat front can work well when you want the colour and handles to provide the detail.
Choose the board grade and thickness alongside the hinge requirements. Some IKEA doors, including the FORSAND examples above, contain a lightweight honeycomb filling. A solid MDF replacement can weigh more even when it has the same thickness.
Thicker MDF is therefore not an automatic upgrade. The finished door weight and the strength of its fixings still need checking.
Shaker doors have an outer frame around a recessed centre panel. They add detail without needing a pattern across the whole door.
Cworkshop’s Shaker doors use a 21 mm moisture-resistant MDF frame with a 9 mm MDF inset. That construction differs from the 18 mm FORSAND doors in the table, so the hinge fit and opening clearance need checking for the new thickness.
The hinge cup holes must fit within the solid outer frame, with enough material around and behind them. Their position should be settled before the door design is approved.
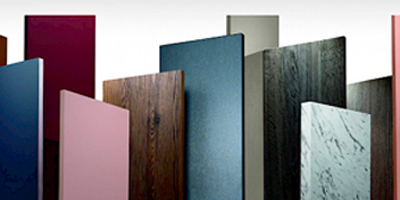
Decorative boards offer finished surfaces in colours and wood effects. Their cut edges need a suitable finish, usually matching or contrasting edgebanding.
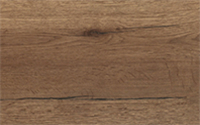
Veneered boards have a thin layer of real wood on the surface. Plan the grain direction across the doors and specify the required protective finish; don’t assume a veneered board arrives ready for use.
Check a physical sample beside the existing wardrobe before settling on a colour. A new white door may differ from an older white frame, particularly where the frame remains visible at the sides.
Choose hinges for the replacement door’s height, thickness and finished weight. Include handles or added mirrors when considering that weight.
IKEA specifies three KOMPLEMENT hinges for the 195 cm FORSAND example and four for the 229 cm version. Those quantities apply to the specified IKEA doors; they do not establish the hinge requirements for a heavier custom door.
Blum’s hinge guidance explains how both weight and height affect the number of hinges needed. Use the guidance for the actual hinge model being fitted, rather than transferring a hinge count from a different product.
You may be able to reuse existing hinges if they are sound and suitable for the new door. The hinge must fit both the door and the mounting plate attached to the wardrobe side. Check these parts together before confirming the drilling.
If the replacement is much heavier, have the frame fixings checked as well. Adding hinges will not repair damaged screw holes or make a weakened wardrobe side sound again.
Keep the hinge arms clear of internal drawers and trays. These need to pull out fully once the doors are open.
End panels, filler strips beside the walls and trim above the wardrobe can close the visible gaps around PAX frames. They can be made to match the new doors or finished in a complementary colour.
Leave the space needed for the doors and handles to move. A door beside a wall may close neatly but hit the wall before it opens far enough to use an internal drawer.
Take care if you want doors that extend lower than the originals. Check their movement over the floor, carpet and skirting, as well as any new base trim beneath the wardrobe.
Filler strips against uneven walls may need scribing, which means trimming them to follow the wall’s shape. Allow for that fitting work when ordering rectangular panels cut to size.
Check the supplied doors against your agreed dimensions and hinge drawing before fitting them. Confirm which door belongs in each position, especially where the wardrobe has different widths or hinge arrangements.
If you are painting MDF yourself, prepare both faces and the edges, then use a suitable primer and paint. Allow the finish to dry and harden as directed before handling and fitting. Cworkshop’s guide to priming and painting MDF explains the preparation in more detail.
Support each door while attaching it, with another person helping where needed. Follow the hinge manufacturer’s fitting instructions and use the specified fixings.
Once the door is secure, make small hinge adjustments to even out the gaps. Check that neighbouring doors open without rubbing, then test every internal drawer and tray.
Mark handle positions consistently across the doors and check the clearance beside walls before drilling. Hinge adjustment can improve alignment, but it cannot correct a door that was ordered at the wrong size.
The overall frame height is not the finished door height. Use the actual door measurements or an agreed design for the frame and hinges.
Doors with the same outside dimensions can have different drilling requirements. Check the hole positions and fixing pattern before machining a whole set.
A solid replacement may be heavier than the original lightweight door. Check the hardware and frame fixings before committing to the material.
A thicker door or projecting handle can change how far the door opens. Leave enough room to reach the storage inside, including pull-out drawers.
Applied edging adds to the panel dimensions. Agree whether the cutting list shows bare panel sizes or finished sizes so that the intended gaps are preserved.
Prepare a cutting list that identifies each door and any matching end panels or fillers. Include:
Agree how edging is allowed for in the final dimensions. Cutting and machining can prepare the components, while checking the wardrobe, fitting fillers and adjusting the doors remain part of installation.
Explore Cworkshop’s boards cut to size service once the door dimensions and hinge requirements are settled.
Cworkshop offers made-to-measure panels and Shaker doors, along with edging and finishing services. Its CNC cutting service can prepare hinge holes from specified sizes, depths and positions.
For painted designs, spray painting is available for new panels cut by Cworkshop. Specify the faces and edge preparation required when discussing the finish.
For a PAX project, settle the door measurements and hinge layout before ordering. Include these details so the panels can be made to the agreed sizes and drilling pattern.
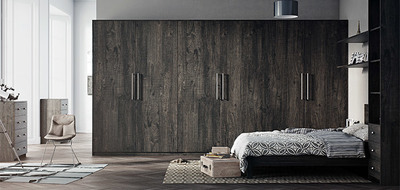
Replacement PAX doors work best when the design starts with the wardrobe you already have. The finished dimensions, hinge layout and door weight need to work together before you settle the cutting list.
Once those details are agreed, you can choose the style and finish with a clearer understanding of what will fit and what preparation is needed.
Contact Cworkshop with your door dimensions and machining requirements to discuss materials, cutting and finishing.