OPEN: MON - FRI 8AM - 5PM
Check our current lead time for Cut & Edge orders COLLECTIONS: 8AM - 4PM
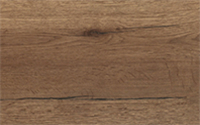
Oak veneered MDF can give shelves, cabinet doors and furniture panels the appearance of natural oak. A suitable finish brings out the grain and protects the surface from everyday handling.
Puiblished: 18th September 2026
The main challenge is preparing the thin oak veneer without sanding through it. The cut edges also need attention, because they expose the MDF core rather than more oak.
For new, unfinished panels, the process is to prepare the edges, lightly sand the veneer where needed, remove the dust and apply a compatible finish. Testing that complete process on an offcut first helps you judge the colour and surface before treating the visible panels.
Oak veneered medium-density fibreboard (MDF) has a thin layer of real oak bonded to the board. You are finishing that timber surface, so the coating needs to suit oak and the intended use of the furniture.
Check whether the panels are unfinished, factory lacquered or already treated. The preparation described here is for unfinished veneer; an existing coating needs its own assessment before cleaning, recoating or removal.
Also check the reverse face. Some panels have a different veneer on the back, which can produce a different appearance under the same finish.
On a shelf, both faces may be visible. On a cabinet side, one face may be concealed. Decide which surfaces will be seen before cutting and arranging the panels.
Choose the finish around the appearance you want and how the surface will be used.
A cabinet door mainly encounters handling and cleaning. A desk or shelf may also face sliding objects, occasional spills and longer contact with items placed on it. Check the product’s stated suitability for those uses.
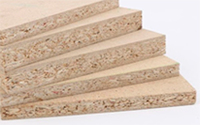
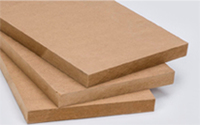
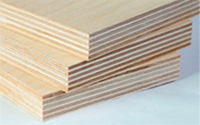
| What are you making? | Better choice | Why? |
|---|---|---|
| Cabinet carcasses | Plywood | Strong, lighter and holds fixings well |
| Painted cabinet doors | MDF | Smooth surface and clean routed profiles |
| Heavy bookshelves | Plywood | Stiffer over longer spans |
| Short painted shelves | MDF | Smooth and economical when well supported |
| Painted furniture | MDF | No grain to show through the finish |
| Clear-finished furniture | Plywood | Real wood veneer can remain visible |
| Routed/Shaker panels | MDF | Consistent material machines cleanly |
| Furniture with frequent screw fixing | Plywood | Better fixing strength, particularly near edges |
| Damp interior areas | Grade dependent | Use suitable MR MDF or appropriate plywood |
| Exterior projects | Exterior-rated plywood or exterior MDF | Standard boards are not designed for outdoor exposure |
| Lower-cost indoor projects | MDF | Usually cheaper than furniture-grade plywood |
| Lower-weight construction | Plywood | Usually lighter at an equivalent thickness |
A clear finish can still change the oak’s colour. Some products deepen the grain and give the wood a warmer appearance, while finishes intended to retain a pale look may contain a small amount of pigment.
For example, Osmo explains that its clear oils darken the appearance of wood, while its Raw finish contains a light white tint. Test the particular product rather than relying on the word “clear”. See Osmo’s finish guidance.
If you want to stain the oak, treat colour and protection as separate decisions. A conventional wood stain usually needs a compatible protective topcoat; a combined coloured finish follows its own coating system.
Use an offcut from the actual board, ideally with a section of the proposed edging attached.
Prepare and coat the sample using the same method planned for the furniture. A quick wipe of oil on an unsanded scrap will not necessarily show the result of the complete finishing process.
Check the sample for:
Natural oak varies in grain and colour. Applying the same finish across a set helps maintain consistency, but it will not make different pieces of veneer identical.
Keep the approved sample nearby while working through the panels.
Decide how the cut edges will look before applying the finish to the faces.
Clear oil or varnish will leave the MDF core visible. To continue the oak appearance around a shelf or door, use suitable oak veneer edging or solid oak lipping.
Cworkshop’s panel edgebanding service includes matching wood edging for veneered boards. Specify which edges will remain visible when the furniture is assembled.
Fit and trim the chosen edging before final sanding and coating. Keep trimming tools and abrasives controlled where the edge meets the face, as the oak veneer can be damaged at that junction.
If the design includes painted, exposed MDF edges, our guide to sealing MDF edges properly covers that preparation.
Have the selected finish and its application instructions ready before sanding. The coating system determines the final abrasive grade, applicator and any preparation needed between coats.
You will usually need:
Use dust extraction and suitable respiratory protection when sanding. HSE’s wood-dust guidance explains the need to control dust at its source.
Leave enough space for panels to dry without touching each other. Complete dusty work before opening the finish, and keep the coating area ventilated as the product requires.
Complete cutting, drilling and trial assembly before the final finish wherever practical. This reduces the chance of marking a coated face while adjusting a joint or drilling for hardware.
If the project needs shaped panels, grooves or repeated holes, include them in the CNC cutting requirements before finishing. Routed details may expose the MDF core, so their appearance needs planning separately from the oak face.
Inspect the surfaces under light coming from the side. This makes scratches, glue smears and uneven areas easier to see.
Remove glue residue carefully before coating. A glue-covered patch can take stain or oil differently from the surrounding oak and become more obvious once the finish is applied.
Where components will be glued together after finishing, keep the bonding surfaces free of coating unless the adhesive manufacturer permits otherwise.
Sand only enough to prepare the surface for the chosen finish. The veneer provides limited material to work with, particularly around corners and edges.
For a smooth, factory-sanded panel, light hand sanding gives more control than trying to remove material quickly with a power sander.
Choose the abrasive to suit both the board and the coating. As one product-specific example, Osmo’s preparation instructions specify a final furniture sanding range of P180–P240 for Polyx-Oil Original. Use that range alongside the board supplier’s guidance, with only the light preparation the veneer needs.
A deep scratch may extend beyond the available veneer thickness. If removing it would risk exposing the MDF, stop and assess a repair or replacement instead of continuing to sand.
Once prepared, remove the dust with suitable extraction and a clean, coating-compatible method. Avoid soaking the surface or cut edges during cleaning.
Support the panel securely and apply the finish using the method that worked on the sample.
Stir or mix the product as instructed, including any pigment that may have settled. Apply it evenly along the grain and observe the specified coverage rate.
Use a product confirmed as suitable for the panel and furniture application.
Spread it evenly and follow the instructions on whether excess material should be removed. Wipe-on oils and brush-applied hardwax oils can have different methods, so do not transfer the instructions from one product to another.
Pay attention to corners, edging and internal angles where excess finish can collect. Heavy application can delay drying and leave an uneven surface.
Deal with used oil cloths immediately. Some drying-oil products can cause contaminated cloths to self-heat and ignite. Follow the product’s storage and disposal instructions; do not leave used cloths bunched together.
For hand finishing, choose a product intended for the brush or roller you will use.
Apply an even coat and check for runs along the underside and edges.
Allow the specified drying time before recoating. If the instructions require sanding between coats, lightly remove dust nibs and raised fibres without cutting back through the coating into the veneer.
Different products have different coating schedules. For example, Ronseal’s Interior Varnish instructions specify two to three coats and sanding before the final coat. Follow the schedule for your chosen product.
A professional spray finish is another option when arranging the panel preparation, particularly for a complete set of furniture components.
Plan the treatment of both faces and all exposed edges, following the panel supplier’s guidance. Concealed surfaces still need consideration even when their appearance is less important.
Let each coated surface become suitable for handling before turning the panel onto clean supports. Avoid trapping a wet face against the bench or stacking newly finished panels together.
Touch-dry, ready to recoat and fully cured are different stages. A surface may feel dry while the coating remains vulnerable to pressure marks, water or cleaning products.
Follow the finish manufacturer’s curing instructions before loading shelves, fitting protective mats or putting the furniture into regular use.
The coating does not make an unsuitable MDF core waterproof. Room conditions and moisture exposure still need to suit the board itself.
Trying to remove a deep scratch can expose the MDF beneath. Inspect damage before sanding and use light preparation across the sound surface.
Glue residue can interrupt colour absorption and leave a noticeable patch. Inspect the joints and edging before applying stain or finish.
A clear coating can warm or darken oak, and a pale finish may leave visible pigment if applied unevenly. Test the complete system on the actual board and edging.
A cut edge exposes the core unless it has been edged or lipped. Decide its appearance before coating the faces so that the completed panel looks intentional from every visible angle.
An opaque primer covers the oak grain. For a clear finish, use only the preparation or clear sealer specified for that coating system, keeping painted-edge treatments off the face.
A dry-feeling surface may still mark under pressure or stick to another panel. Allow the specified handling and curing times before stacking, packing or loading the furniture.
Settle the panel sizes, grain direction and exposed edges before ordering. Those decisions affect how the finished furniture will look as well as how it fits together.
Include the following in the cutting list:
If neighbouring fronts need a particular grain arrangement, discuss that requirement before ordering. Identical dimensions alone do not establish a matched grain pattern.
Having the main panels prepared reduces full-sheet handling and repeated cutting. Allow separately for any site adjustments, and prepare newly exposed edges before final installation.
Cworkshop offers veneered boards, cutting and edge preparation that can be specified together for the furniture you are making.
The available services include:
Confirm the faces, edges and finish required before placing the order. Cworkshop’s spray service applies to panels cut in its factory, and edges must be edgebanded to be included in that service.
A good finish on oak veneered MDF starts with preserving the thin oak surface and planning the exposed edges. Light preparation and a tested coating system help the faces and edging work together.
Complete the cutting and fitting decisions first, then allow enough space and time for careful application and curing. This makes the finishing stage easier to control across a complete set of panels.