OPEN: MON - FRI 8AM - 5PM
Check our current lead time for Cut & Edge orders COLLECTIONS: 8AM - 4PM
Home bars have never been more popular. A 2022 survey found that one in 13 UK homeowners is planning on creating a home bar this year. After years of spending more time at home thanks to the Covid-19 pandemic, installing home bars has become a priority for many of us. In fact, in the first year and a half of the pandemic, 2.7 million households reportedly curated their own home bars.
You're certainly not alone if you've been dreaming of your bar in your home or garden. However, many people have put off the idea because they assume it's extremely expensive or difficult to install a home or garden bar.
Fortunately, it's surprisingly cheap and easy to build your bar. You don't need advanced woodworking skills -- with a bit of time and effort, it's possible to create an eye-catching piece of bespoke furniture that perfectly fits your space and needs. By opting for plywood as your material of choice, you can keep costs low, so you have even more money to spend on all those spirits and wines you'll want to stock it with.
So, how do you get started with your DIY bar plans? Here's everything you need to know about building a budget-friendly plywood home or garden bar, from the materials you need to the planning process and assembling and finishing your eye-catching piece of furniture.
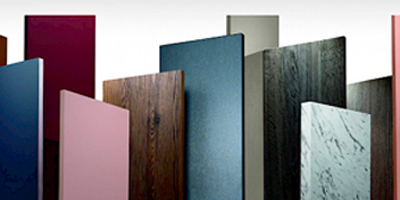
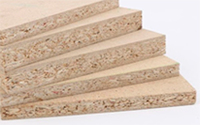
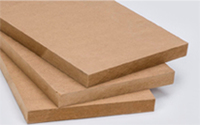
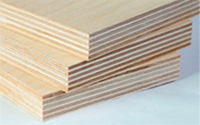
Plywood is the perfect material for DIY projects. Created by cutting timber into sheets (plies) and pressing them together using adhesive (waterproof resin), plywood is a strong and flexible material lighter than other composite materials like MDF, making it great for building furniture. The veneers are rotated so that the grain of the wood alternates, helping the material stay solid and durable. This also reduces expansion and shrinkage and the risk of splitting when nailed at edges or corners. Moreover, plywood usually uses an odd number of plies to minimise the risk of warping further. Due to being treated in the manufacturing process, plywood is also resistant to water and chemicals, which means it doesn't matter when you inevitably spill a drink on the bar!
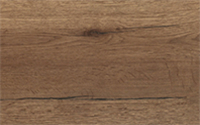
In addition to these qualities, birch plywood has an attractive and versatile appearance. It is warm, natural, and timeless, making it an excellent choice for building furniture. Furthermore, its cost-effectiveness makes it the obvious choice for first-time DIY furniture makers and experienced woodworkers.
Choosing the right type of plywood for your home or garden bar is essential when building a wooden bar.
For more help choosing your perfect plywood, read our complete plywood buying guide or get in touch, and we’ll be happy to help.
Here are some essential tips for working with plywood to get the best results from your DIY build.
It’s a good idea to pre-drill the holes in the side of your plywood. This will help prevent the wood from cracking and looking messy. Always drill from the front face (the side on the show) because plywood is more likely to split on the backside.
The plywood edges look very different from the top because they show the layered veneers. If you try to stain them, they will look completely different from the rest of the wood. As a result, we recommend choosing a design that hides these raw edges and corners or using edge banding to hide these sections.
It can be tricky to perfectly cut plywood without a table saw, so we recommend choosing a supplier that can cut the material for you. Here at Cworkshop, we cut sheets of plywood to the precise measurements and shapes you require, making your DIY project even more accessible. Just provide us with your plans, and we’ll be happy to help.
If you decide to cut your plywood, remember that rip cuts (with the wood grain) are less likely to splinter, while cross cuts (against the grain) might lead to splintering and chipping. To do the latter, measure your cut and put a piece of masking or painter’s tape in place. Cutting directly through the piece of tape reduces the risk of splintering.
One of the first things you'll need to do is measure the space in your room or garden in order to plan the dimensions of your bar. Generally, bars tend to stand at around 42 inches (bar stools are around 30 inches tall) and around 16-20 inches wide at the top. An overhang of at least 8 inches is ideal, and a foot rail or ledge (if you choose to include it) should be around 7-9 inches high off the floor.
Don't forget to consider your bar furniture: do you already own barstools, or will you buy them or build them yourself? How much space do the stools need? The height and width of your barstools will also impact the size of your bar top. If the bar stools already have a footrest, you might choose not to install a foot rail or ledge.
Side note: a bar with no running water is called a dry bar, while a bar with a sink is often called a wet bar.
To build your home or garden bar you’ll need to get your tools together. Here’s a checklist of tools and equipment you may need for the build.
Tape measure
Level
Hammer
Drill
Compound mitre saw
Circular saw
Wood glue
Screws
Safety goggles
Hand sander
Caulking gun
The exact steps for building your indoor or outdoor bar will depend on your preferred design, but as a general rule, the first thing you’ll want to do is create the frame and make sure it’s level and fits in your space. Then, add your plywood sheets to the edge. The next step is to add your trim, then the bar top. Build a lower counter if you include it and install the shelves. You might also add a bar rail or ledge, although this isn’t necessary if you choose bar stools with a built-in footrest.
It may be tempting to skip this step, but sanding is essential to remove marks that may appear clearly after staining. First, sand the plywood carefully and lightly. There's a risk of sanding through the thin top veneer, so you'll need to use a 180 grit or 240 grit sandpaper or use the lowest speed on a variable speed orbital sander.
Don't forget to sand your edges slightly round to create a clean finish if they will be on show. After filing the bar, wipe it down with a cloth to remove any remaining sawdust.
Different types of plywood may or may not require a wood conditioner for more even absorption. Birch or pine plywoods absorb stain unevenly, so using a wood conditioner on these materials is a good idea.
However, the wood conditioner makes the stain lighter, increasing the difficulty of controlling the shade. If you don't want this problem, consider alternative ways to achieve an even stain, such as using a gel stain or applying the paint using a rag rather than a foam brush.
Traditional oil-based stains are the type most often used for staining plywood and are the cheapest and most accessible type. However, some woodworkers find that they can become blotchy on birch plywood.
Another option is to choose a thicker gel stain which can create a more even coverage. Water-based stains are also possible, although these produce a weaker colour and will likely need multiple coats.
Before you commit to staining the bar, make a test sample on a piece of leftover plywood. At this point, you might want to compare the results of using or not using a wood conditioner or applying a stain with a rag or a foam brush. The sample will allow you to try out your different options and make an informed decision.
Add the stain to the plywood, following the directions appropriate for your stain type. Remember to work in the same direction as the grain for a neater and nicer appearance.
Especially if you're building the bar in your garden, it's essential to seal the plywood to make it waterproof. An epoxy sealer, varnish, or drying oil can help make your bar more resistant to the outdoors and spilt drinks.
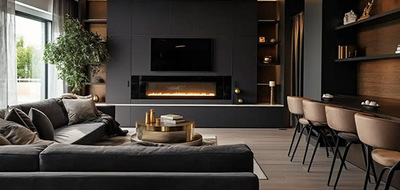
Then, it's time to add the finishing touches to give your wooden home bar a correct look. LED light strips can look fabulous on a home bar if you opt for a sleek and modern design, while more traditional home bars might use rubber bar mats and cosy lighting for that classic pub look. It's entirely up to you.
Now, stack your glasses on the shelves, and add bottles, cocktail-making equipment, and any other accessories your DIY home bar needs.
With your home bar completed, pour yourself a drink to celebrate. Thanks to birch plywood's timeless and versatile appearance, the bar is sure to look stunning in any space, whether you put it in the corner of a room or outdoors in your garden.
Ready to get started building your bar? Browse our collection of beautiful premium quality plywood and select your materials, or visit our store's London showroom for inspiration.
Or, if you're looking for more DIY project ideas, visit our online inspiration hub for our best DIY and redecorating ideas.
What will you build next? We pride ourselves on providing inspiration and how-to guides to aid your home improvement projects. If you are looking to embark on a DIY project and are looking for assistance, be sure to contact us! We'd be happy to help.